Tech Tips: Backup Scheduler

Protect Your Data This Tax Season with Regular Backups
Prevent data loss by backing up your data regularly this tax season using our Backup feature. Set up a customized backup location to keep your files safe. Run Backups as necessary or create a Backup Schedule to match your business needs.
Our Backup feature is available on our Individual and Business programs, if you do not have the program installed it is available to download from our website. If you need assistance installing the program call us at 909.931.3131 and one of our technicians will help you through the process.
How to Set Up Your Backup
Step 1:
From the Main Menu, go to Misc. Features [09] to open the Backup screen.
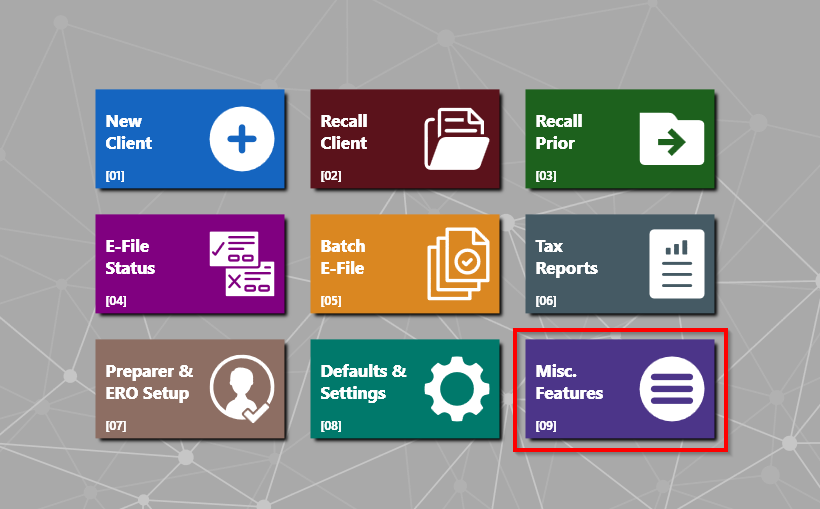
This is where you’ll manage all backup locations and schedules.
Step 2:
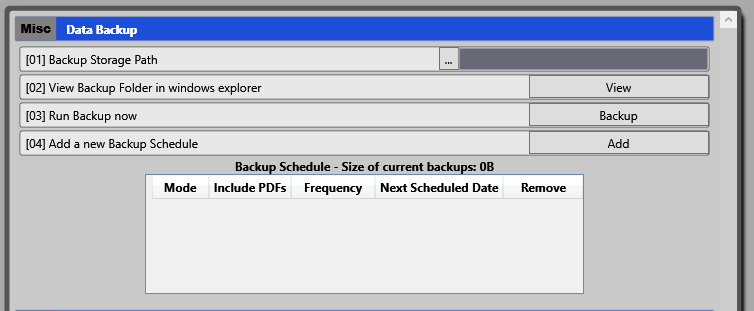
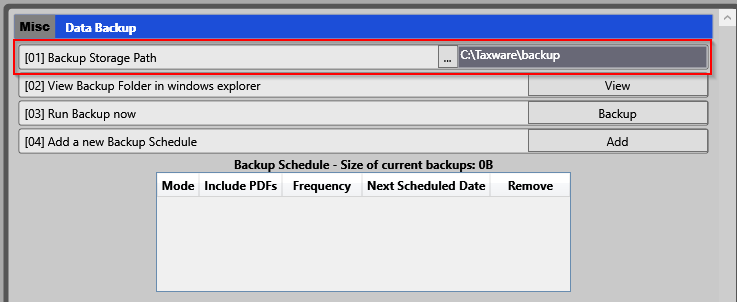
Choose where you want your backups to be stored:
-
Click Backup Storage Path [01] and use the […] button to browse to your desired folder.
-
To confirm it’s set correctly, click View [02] to open the selected folder.
-
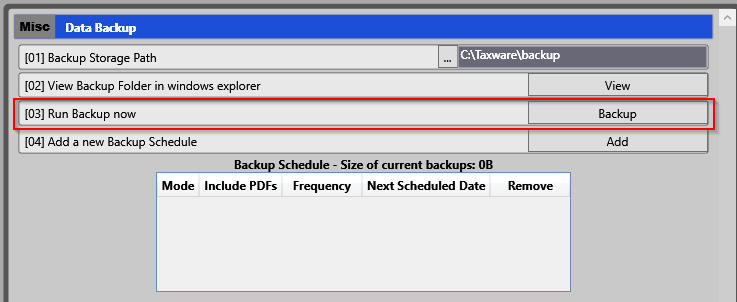
You can manually initiate a backup at any time by selecting “Backup” [03].
-
Note: This action will create a comprehensive backup of all data from 2020 through the current year.
-
-
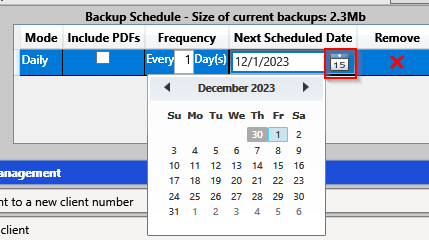
If you prefer scheduled backups, select Add [04] to create a schedule.
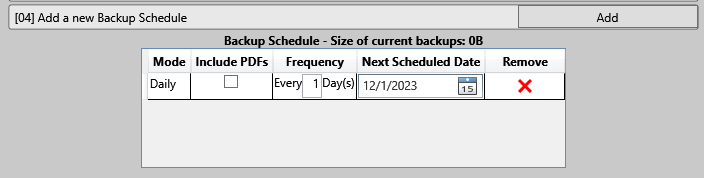
Step 3:
Select the date and frequency for your scheduled backups.
Customize them to run daily, weekly, or monthly, depending on your business needs.
You can create multiple schedules if needed.
Step 4:
-
Use Add to create new ones
-
Use the Red X to remove any schedules you no longer need

Step 5:
Decide whether you want to include PDFs in your backup.
Check the Include PDFs box – just remember that including PDFs may increase the size of your backups.
We’ve also put together a short video tutorial to walk you through these steps visually.
If you have any questions or would like help reviewing your backup settings, we’re here to support you. Protecting your data is one of the most valuable investments you can make this tax season!